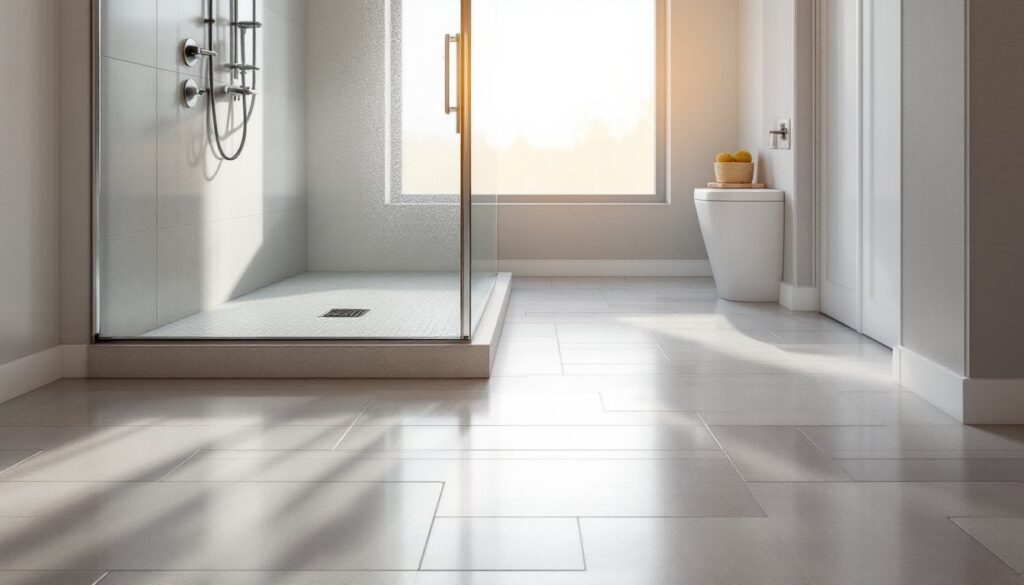
A walk in shower base is the foundation that makes a zero-threshold shower possible, no lip, no step up, just a smooth transition from bathroom floor to shower. Whether you’re renovating a master bath or updating a guest bathroom, the choice between a tile-and-mortar base and a pre-formed unit will affect your budget, timeline, and long-term durability. Homeowners often overlook the base when focusing on tile or fixtures, but getting it wrong leads to water damage, cracks, and costly repairs down the road. This guide walks you through what to look for, which type suits your space, and how to approach installation.
Table of Contents
ToggleKey Takeaways
- A walk in shower base must have a slope of at least 1/4 inch per foot toward the drain to prevent water pooling and ensure proper drainage per building codes.
- Choose between a tile-and-mortar base for customization and durability or a pre-formed acrylic/fiberglass base for faster installation and easier maintenance.
- Proper waterproofing is critical to prevent costly water damage; mistakes with the waterproof membrane in a tile-and-mortar walk in shower base can lead to hidden leaks and expensive repairs.
- Pre-formed bases cost $800–$2,500 while tile-and-mortar bases typically run $2,000–$4,000+ when labor is included, affecting your renovation budget.
- Run your exhaust fan during and 20–30 minutes after showers to control humidity and prevent mold, mildew, and material breakdown in your walk in shower base.
- Inspect caulk, grout, and the base itself regularly; re-grout tile-and-mortar bases every 3–5 years and immediately address signs of water pooling or soft flooring to prevent structural damage.
What Is a Walk In Shower Base?
A walk in shower base is a waterproofed platform that sits at floor level, sloped slightly to drain water toward a central or linear drain. Unlike a traditional shower pan that sits several inches above the surrounding floor, a walk in base is level (or nearly level) with the rest of your bathroom, creating an accessible, modern aesthetic.
The slope, typically 1/4 inch per foot toward the drain, is critical. It prevents pooling and ensures water flows where it’s supposed to go. Most building codes, including the IRC (International Residential Code), require proper sloping and a drain that’s sized for the shower’s square footage. Your base must be impermeable to stop water from penetrating the floor structure and subfloor below.
Two main approaches accomplish this: building a traditional tiled base over a mortar bed with a waterproof membrane, or installing a pre-manufactured base that’s already sloped and ready for tiling or a finished surface. Each has trade-offs in labor, cost, and material durability that affect your decision.
Types of Walk In Shower Bases
Tile and Mortar Bases
A tile-and-mortar base is built on-site using a sloped mortar bed over a substrate, often concrete or cement backer board, with a waterproof membrane (like a liquid sealant or sheet membrane) sandwiched in between. The slope is hand-formed during the mortar process, and the finished surface is then tiled.
Pros: Highly customizable in size and layout. You can accommodate odd-shaped rooms, large walk ins, or multiple drain locations. Tile allows design flexibility, mix patterns, colors, or finishes. The base itself is durable when done correctly.
Cons: Labor-intensive and time-consuming. Requires skilled application of the waterproof membrane: mistakes here cause leaks that are hard to trace and expensive to repair. The mortar bed takes time to cure, so the project timeline is longer. If one section cracks, the entire waterproof seal is at risk.
Pre-Formed Acrylic and Fiberglass Bases
These one-piece or modular shower bases come with the slope already built in. Most are acrylic (durable, glossy finish) or fiberglass (lightweight, less expensive, thinner walls). They’re ready to set, connect to plumbing, and finish.
Pros: Fast installation, often a day or two versus a week or more for tile-and-mortar. Built-in slope eliminates guesswork. Waterproofing is integral to the molded unit. Less mess and fewer potential leak points. Easier for DIY installation if you follow the manufacturer’s guidelines.
Cons: Limited customization in size. You’re locked into the manufacturer’s dimensions and drain location. They can feel commercial or plastic compared to tile. Acrylic and fiberglass can crack or flex under heavy weight or impact. Repairs often require replacement of the whole unit rather than patching.
Research from This Old House and similar home renovation resources often highlights that pre-formed bases work well for standard master bath or secondary bath sizes, but custom homes or unusual layouts may push you toward a tile-and-mortar approach.
Key Features to Consider When Choosing a Base
Drainage and Slope: Confirm the base has the correct slope (1/4 inch per foot minimum) and that the drain size matches your shower footprint. A drain too small for the base area will cause backups and water pooling. Most residential walk ins need at least a 2-inch drain for every 25–30 square feet of floor.
Material Quality: Acrylic holds up better than fiberglass over time and resists staining and discoloration. If choosing a pre-formed unit, look for brands with thicker walls (typically 0.25+ inches) to reduce flex and cracking. For tile-and-mortar, invest in a high-quality waterproof membrane, liquid membranes or sheet membranes rated for wet areas are both effective, but sheet membranes are easier for DIYers to install without gaps.
Accessibility: A true walk in with minimal or no lip is ideal for aging in place or mobility concerns. Check the lip height (should be under 1/2 inch for accessibility, per ADA guidelines). Some pre-formed bases have a slight lip that can catch feet.
Maintenance: Tile-and-mortar requires periodic grouting and resealing. Pre-formed units are simpler, just clean regularly and avoid abrasive scrubbers on acrylic. Check if the base material is prone to mildew or staining in humid climates.
Cost: Budget $2,000–$4,000+ for a tile-and-mortar base when labor is factored in: pre-formed bases run $800–$2,500 depending on size and material. Material costs vary by region and market conditions, so get local quotes.
Installation Basics for DIY Enthusiasts
For a Pre-Formed Base:
- Prepare the floor. Ensure it’s level or slightly pitched toward the drain. If the floor is uneven, you may need to shim or level with mortar or self-leveling concrete.
- Check the drain. Confirm the base’s drain opening aligns with your rough-in drain. Dry-fit the base if possible before final placement.
- Set the base in mortar. Use a thin bed of mortar beneath the base to lock it in place and keep it from rocking. Some manufacturers recommend their adhesive specifically, follow the manual.
- Connect plumbing. Seal the drain connection per your plumbing code (usually with PVC primer and cement or silicone caulk, depending on the drain type).
- Finish the edges. Apply caulk or trim where the base meets the surrounding floor, this prevents water from sneaking underneath.
For a Tile-and-Mortar Base (Advanced):
This is doable for a confident DIYer, but mistakes are costly. Hire a professional if you’re unsure about waterproofing. Briefly:
- Build a substrate (concrete or cement backer board).
- Install a waterproof membrane, most DIYers succeed with a liquid sealant applied in two coats, or a pre-cut sheet membrane like Kerdi or Schluter.
- Shape and set the mortar bed with a slope toward the drain. Use a level or slope guide to check your work.
- Tile the surface once the mortar cures (typically 48+ hours).
Key Safety Notes:
Wear safety goggles and dust masks when cutting backer board or concrete, silica dust is hazardous. Use gloves when handling waterproof sealants and caulks: some are skin irritants. For structural or plumbing work that requires permits, hire a licensed contractor. Most jurisdictions require permits for bathroom remodels to ensure code compliance and proper drainage.
Fine Homebuilding offers detailed guides on waterproofing and slope calculation if you need to brush up on technique before starting.
Maintenance and Longevity Tips
Pre-Formed Bases:
Clean weekly with a non-abrasive bathroom cleaner. Avoid scouring powders or steel wool on acrylic, they scratch and dull the finish. Check caulk around the drain and edges yearly and recaulk if it cracks or pulls away. Inspect the base for crazing (fine cracks) or visible flexing under foot: these can allow water behind the base and eventually lead to mold or structural damage.
Tile-and-Mortar Bases:
Re-grout or reseal every 3–5 years depending on traffic and humidity. Check the grout for cracks or missing sections: water can seep through compromised grout and reach the waterproof membrane. If water begins pooling instead of draining, the membrane or slope may have failed, address this quickly to prevent subfloor rot.
Both Types:
Ensure your bathroom exhaust fan runs during and for 20–30 minutes after showers to control humidity. High moisture accelerates mold, mildew, and material breakdown. Check for soft spots in the surrounding floor: these indicate moisture has penetrated the structure. If you spot mold, soft flooring, or persistent odors, investigate immediately, catching leaks early saves thousands in water damage repair.
A notable Brooklyn brownstone renovation demonstrates how thoughtful material selection and proper installation in wet areas protect the structural integrity of older homes, underscoring why waterproofing and maintenance shouldn’t be an afterthought.