A broken or stuck window crank turns a simple task, opening a window, into a frustrating daily inconvenience. Whether it won’t turn, spins freely without opening the window, or the handle snapped off entirely, a faulty crank can also leave you stuck with a sealed window in an emergency. The good news: replacing a window crank is one of the most straightforward home repairs you can tackle yourself. It typically takes under an hour, requires minimal tools, and costs far less than calling a professional. This guide walks you through the entire process so you can get your window operating smoothly again.
Table of Contents
ToggleKey Takeaways
- Window crank replacement is a DIY-friendly repair that typically takes under an hour and costs far less than professional service calls.
- Common signs your window crank needs replacement include handles that spin freely without opening the window, cracked handles, or difficulty turning the mechanism.
- Always identify your window’s manufacturer before purchasing a replacement window crank operator, as they are model-specific and incompatible across different brands.
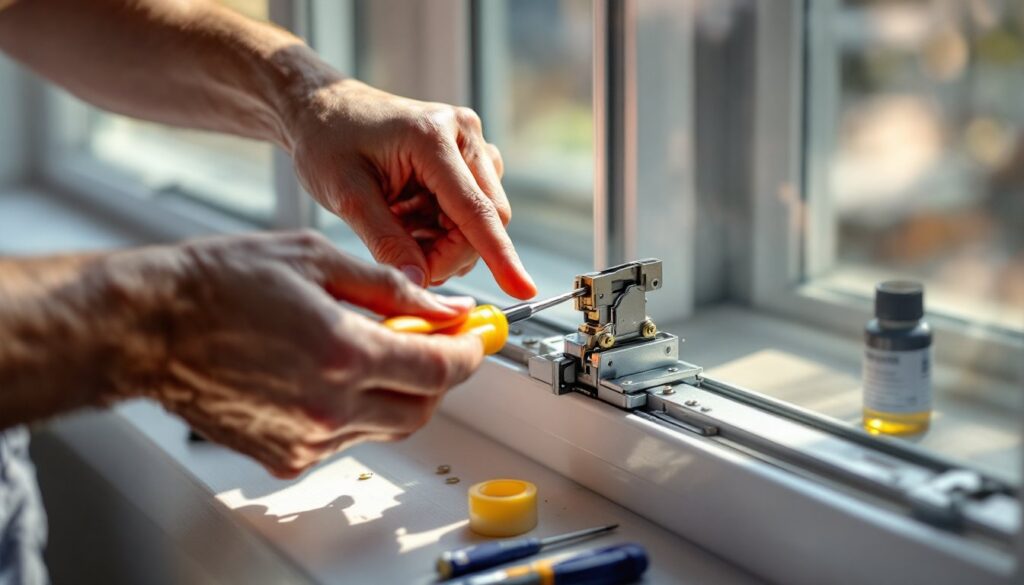
- Proper installation requires securing the operator bolts, reconnecting the linkage arms, and testing the window’s full range of motion to ensure smooth operation.
- Applying silicone-based lubricant to the new crank’s gears and linkage annually prevents stiffening and extends the lifespan of your replacement operator.
Understanding Your Window Crank System
A casement window crank (also called an awning window crank) is the handle and mechanical assembly that controls the opening and closing of windows that swing outward on hinges. Unlike single- or double-hung windows that slide vertically, casement windows rotate outward using a linkage system connected to the crank mechanism.
The crank itself has two main components: the handle, the part you grip, and the operator, the metal gearbox attached to the window frame that translates the handle’s rotation into the scissor-like motion that opens and closes the sash. Inside the operator sits a series of small gears and a sliding track that work together. When the crank turns, it engages these gears, which drive the linkage arms outward and inward.
Most cranks are mounted on the interior sill of the window frame with two fasteners (typically screws). The operator bolts directly to the frame’s horizontal track, and the linkage arms connect the operator to the sash itself. Understanding this layout helps you see why a crank fails: wear on the internal gears, a stripped screw hole, or damage to the handle makes the whole system unreliable.
Signs Your Window Crank Needs Replacement
Watch for these red flags that indicate a crank replacement is in your near future.
The handle spins freely without moving the window. If you turn the crank but the window doesn’t budge, the internal gears have likely stripped. This is the most common failure mode and signals it’s time to swap the crank.
The crank is hard to turn or sticky. A little resistance is normal, especially in older windows, but if you have to force it or it jams midway, the operator’s gears or linkage may be corroded or broken. Try cleaning the mechanism first, dirt and old lubricant buildup sometimes mimic mechanical failure, but if it persists, replacement is safer than forcing it and damaging the linkage.
The handle is cracked, bent, or missing. A broken handle obviously signals replacement time. Even if the operator still functions, a damaged handle is uncomfortable to use and won’t last long under stress.
The window won’t fully open or close. If the sash stops short or won’t seal, the operator’s linkage arms may be bent or the mechanism is jammed. Minor adjustments sometimes fix this, but a replacement ensures full, smooth operation.
If the problem is a stuck window frame (paint sealed shut, for example) rather than a faulty crank, clean and free the sash first, don’t immediately assume the crank is broken.
Tools and Materials You’ll Need
Tools:
• Screwdriver set (both Phillips and flathead: a multi-bit screwdriver is handy)
• A small adjustable wrench or socket set (for the operator bolts)
• Flashlight (to see inside the frame)
• Needle-nose pliers (helpful for manipulating the linkage arms)
• Penetrating oil like WD-40 or PB Blaster (if fasteners are corroded)
• Painter’s tape (optional, but useful for marking screw locations)
Materials:
• Replacement window crank operator that matches your window’s make and model. Bring your old operator to the hardware store or research the window manufacturer’s part number beforehand.
• Silicone-based lubricant (like Tri-Flow) for the new mechanism
Safety Gear:
• Safety glasses or goggles (metal fasteners and debris can spring out)
• Work gloves (to protect hands from sharp edges on the frame)
Pro tip: Window crank operators are manufacturer-specific. A crank for an Anderson window won’t fit a Pella frame. Identify your window’s manufacturer (usually stamped or printed on the frame) before buying a replacement. Hardware stores and online retailers like Amazon and Lowe’s stock most common models, but you may need to special-order older windows.
Step-by-Step Replacement Process
Removing the Old Crank Handle
-
Close the window completely. Ensure the sash is fully closed and the linkage is at rest. This reduces tension on the fasteners and makes removal safer.
-
Locate the fasteners holding the handle. These are usually two small screws on the interior face of the crank, where the handle meets the frame. Some models have one screw underneath the handle instead. Use a flashlight if the sill is shadowed.
-
Remove the screws. Use the appropriately sized screwdriver (typically Phillips head). If a screw is stuck, spray a small amount of penetrating oil around the screw head, wait 5–10 minutes, and try again. Don’t force a rusted screw, you’ll strip the head or break it off inside the frame.
-
Unscrew the operator bolts. The operator (the metal gearbox) bolts to the window frame’s track. You’ll see two or three bolts, typically ¼-inch hex bolts, running through the frame. Use your wrench or socket to remove these. They may be tight: again, penetrating oil helps if they’re corroded.
-
Detach the linkage arms. The two scissor-like arms connecting the operator to the sash pivot at one end and bolt to the sash at the other. Unscrew the bolts connecting the arms to the sash. Mark their locations with painter’s tape if you’re unsure where they reattach.
-
Remove the old crank assembly. Slide the operator and handle out from the frame. Set aside the old hardware.
Installing Your New Crank
-
Insert the new operator into the frame. Position the new operator in the same location as the old one. Align the bolt holes with the frame’s track.
-
Secure the operator with bolts. Hand-tighten the bolts first to ensure they’re threading properly. Then use your wrench to tighten firmly, snug but not overtightened, or you’ll strip the threads. The operator should sit flush against the frame with no gaps.
-
Reconnect the linkage arms. Slide the scissor arms’ slots onto the operator’s pivot studs. Some linkages require a specific order (one arm first, then the other). Check your new crank’s instructions if included. Bolt the free ends of the arms to the sash at the locations you marked earlier.
-
Attach the handle. Screw the handle to the front of the operator using the two fasteners provided. Tighten snugly, again, don’t over-torque or you’ll crack the plastic handle.
-
Test the operation. Open and close the window slowly through its full range. The crank should turn smoothly without binding or resistance. If it’s stiff, check that the linkage arms aren’t twisted and that all bolts are properly seated.
-
Apply lubricant. Once the window operates smoothly, spray a small amount of silicone-based lubricant on the operator’s gears and linkage joints. Cycle the window open and closed a few times to distribute the lubricant. Wipe away any excess.
Note: If your window won’t open fully after replacement or binds partway through, the linkage arms may be slightly misaligned. Loosen one arm’s bolt slightly, wiggle it into better alignment, and re-tighten. This fine-tuning usually resolves binding issues.
Common Mistakes to Avoid
Buying the wrong replacement crank. Double-check your window’s manufacturer and model number before ordering. Installing a mismatched crank wastes time and money. When in doubt, bring a photo of your old operator and handle to the hardware store.
Forcing stuck fasteners. If a bolt or screw refuses to budge, don’t muscle it. A broken fastener stuck inside the frame is a nightmare. Use penetrating oil and patience instead.
Skipping the linkage adjustment. New operators sometimes have slightly different arm positioning than the old one. Test the window’s full range before declaring the job complete. Minor adjustments now beat a jammed window later.
Over-tightening bolts. Snug fasteners are fine: over-tight ones strip threads and can crack the frame’s track or the operator itself. Hand-tighten first, then give each bolt a firm quarter-turn with your wrench.
Forgetting lubricant. A new crank without lubrication will stiffen up within months. Spray silicone lubricant on the gears and linkage annually to keep it running smoothly. Avoid WD-40 as a long-term lubricant, it dries out. Silicone-based sprays or household step-by-step DIY project tutorials designed for windows last longer.
Not supporting the window while working. If your window swings outward on its hinges, keep it closed and latched while you work on the crank. An open window puts stress on the hinges and linkage, making removal harder and risking injury.
Resources like Family Handyman and Popular Mechanics also cover window repair basics if you want additional reference material before starting.