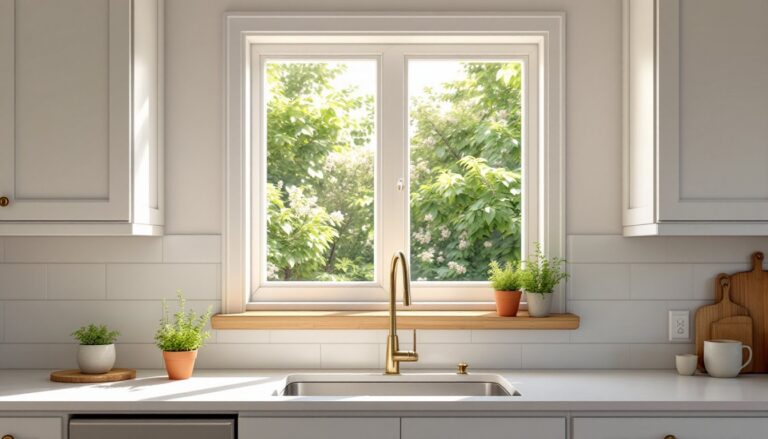
A stuck or broken window latch is more than just annoying, it’s a security issue and a red flag that your windows aren’t functioning properly. Whether your latch won’t catch, refuses to budge, or hangs loose, replacing it is one of the most straightforward window repairs a homeowner can tackle. You don’t need special skills or expensive tools, just a screwdriver, basic measurements, and about thirty minutes per window. This guide walks you through the whole process, from diagnosing the problem to installing your new latch so your windows open and close smoothly again.
Table of Contents
ToggleKey Takeaways
- Window latch replacement is a straightforward DIY repair that restores security, improves energy efficiency, and eliminates drafts without requiring special skills or expensive tools.
- A functioning window latch serves three critical functions: holding the sash closed, providing a secure seal against drafts and moisture, and preventing unauthorized entry from outside.
- Replace your window latch if it’s visibly damaged, corroded, won’t catch smoothly, rattles when engaged, or makes grinding or squeaking sounds even after lubrication.
- To identify the correct replacement latch, measure the screw hole spacing (typically 3 to 4 inches), note whether it’s surface-mounted or mortised, and photograph the current latch before purchasing.
- Window latch replacement typically takes about 30 minutes per window and involves removing the old latch, inspecting screw holes for damage, aligning and securing the new latch, and testing the action before painting if needed.
Why Your Window Latch Matters
Your window latch does three critical jobs: it holds the sash (the movable frame) in the closed position, it provides a secure seal to resist drafts and moisture, and it keeps intruders from forcing the window open from outside. A functioning latch also prevents accidental drops in double-hung windows, which is a genuine safety hazard if you have young children or pets.
When a latch fails, your whole window assembly suffers. A gap between the sashes lets in cold air, driving up heating bills in winter. Loose or misaligned latches can allow moisture to seep into the frame, promoting rot in wood sashes and eventual structural damage. Beyond comfort and energy loss, a weak latch is an easy entry point, burglars know that a rattling or loose window is a sign of deferred maintenance and opportunity.
The good news is that replacing a latch restores all of these functions without overhauling the entire window. Most latches are standard designs that have changed little in decades, so finding a compatible replacement is usually simple.
Signs It’s Time to Replace Your Window Latch
The clearest sign is physical damage: a latch that’s visibly cracked, bent, or rusted should be replaced. Look for corrosion on metal latches (usually a brownish or white powdery coating), which weakens the latch material and makes it brittle. If you have to jiggle or apply unusual force to get the latch to catch, it’s worn or misaligned, and replacement is easier than coaxing it to work.
Another red flag is excessive play or looseness when the latch is engaged. Push gently on a closed window, if it rocks or you hear rattling from the latch hardware, that latch is shot. Similarly, if the latch won’t stay in the open position (for casement or awning windows), the pivot or spring mechanism has failed.
Listen also for grinding, squeaking, or clicking sounds when operating the latch. These often signal internal wear. In some cases, lubrication helps, but if the noise persists after applying a dry lubricant like PTFE (Teflon-based spray), the latch mechanism is likely too worn and replacement is the next step. Don’t ignore a latch that feels loose the moment you install it, that’s a sign of stripped holes or an incompatible replacement, which we’ll address below.
Tools and Materials You’ll Need
Tools:
- Screwdriver (Phillips or flathead, depending on the latch screws, check before you start)
- Drill-driver (optional but speeds up screw removal, especially if fasteners are corroded)
- Tape measure or ruler
- Pencil
- Safety glasses
Materials:
- Replacement window latch, the crucial part. See the next section for how to identify the right one.
- Paintable silicone caulk (optional), use this if you notice gaps around the old latch holes after removal and want a seamless finish before priming and painting.
Optional but useful:
- Penetrating oil (such as a light machine oil), helps loosen corroded fasteners: let it soak for 5–10 minutes before trying to remove screws.
- Paint and primer matching your window frame (if you’ll be refinishing after removal).
Before you buy a replacement, identify your current latch. Measure from the center of one screw hole to the center of the next: this distance (typically 3, 3.5, or 4 inches for standard residential windows) is your latch spacing. Note the latch style: surface-mounted (screwed to the outside of the frame) versus mortised (recessed into the frame). Snap a photo with your phone and bring it to the hardware store or use it to search online. Having the correct replacement saves a return trip.
Step-by-Step Replacement Process
Remove the Old Latch
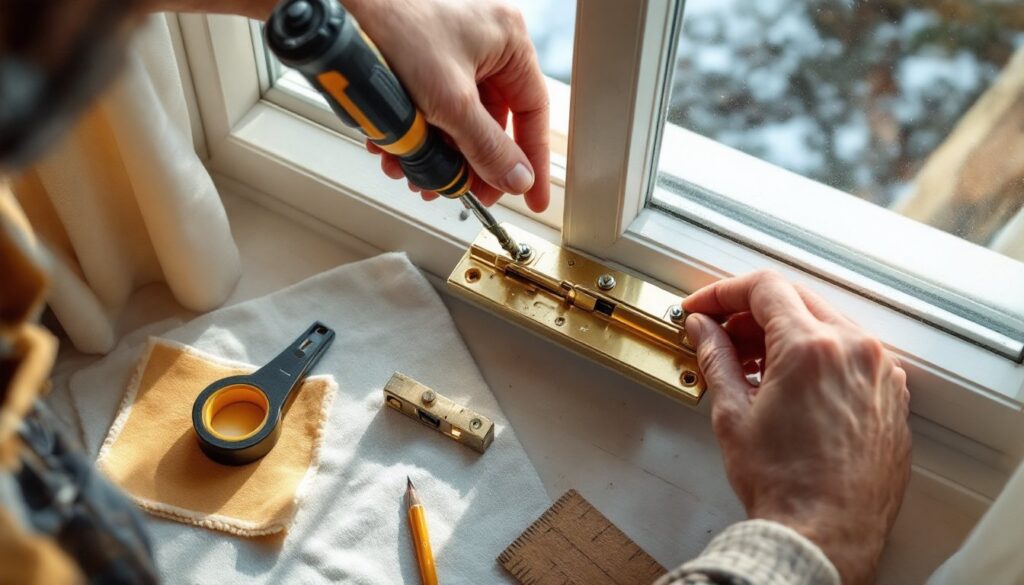
Step 1: Open the window fully and inspect the fasteners. Some latches are held with two screws, some with three or four. Wear safety glasses in case a screw slips and flies. If the screws are corroded or stuck, apply penetrating oil and wait a few minutes before attempting removal.
Step 2: Remove all fasteners. Use a Phillips or flathead screwdriver that fits snugly in the screw head to avoid stripping. If a screw is really stuck, a battery drill-driver with a reverse setting can help extract it without damaging the head. If the screw head is already stripped, you may need a screw extractor bit or pliers to grip and turn the fastener.
Step 3: Lift the old latch away. Most surface-mounted latches will come free once screws are out. Mortised latches (those recessed into the frame) may require gentle wiggling or a flathead screwdriver inserted as a lever, but avoid prying so hard that you crack the wood frame. If the latch is stuck, a light tap with a hammer against the screwdriver will break it free.
Step 4: Inspect the screw holes. Look at the holes where the old latch was fastened. If they’re enlarged, stripped, or filled with paint, you may need to fill them or use slightly larger screws on the replacement. For minor enlargement, moving to a screw that’s one gauge larger (e.g., from #6 to #8) often works. For significant damage, use a wooden toothpick or golf tee coated with wood glue to fill the hole, let it dry, then trim it flush and drill a fresh hole.
Install the New Latch
Step 1: Align the replacement latch. Set the new latch in the same position where the old one sat, ensuring the screw holes align as closely as possible with the existing holes. If your new latch has holes that don’t match the old ones (which is rare with standard sizes), mark the new holes with a pencil, remove the latch, and drill new holes with a appropriately sized bit.
Step 2: Secure with fasteners. Insert the screws (usually supplied with the new latch) and tighten them hand-tight first. Check that the latch aligns properly with the strike plate or keeper on the opposite sash, there should be no gap and no binding. Once alignment is confirmed, tighten the screws fully with your screwdriver. Don’t over-tighten: this can crack the frame material or strip the fasteners.
Step 3: Test the action. Open and close the window several times, engaging and disengaging the latch. It should catch smoothly without resistance and hold the sash firmly closed. If the window rattles or the latch doesn’t fully engage, loosen the screws slightly and shift the latch a fraction of an inch, then retighten and test again. Minor adjustments often cure the problem.
Step 4: Paint or finish if needed. If you removed paint with the old latch or the new latch is bare metal, apply primer and paint to match the window frame. This protects the new hardware from corrosion, especially on the exposed screw heads. Allow primer and paint to cure per product instructions (typically 24 hours) before operating the window frequently.
For a detailed walkthrough, resources like how to repair a window sash cover related frame issues you might encounter. If your latch repair is part of a larger stuck-window problem, addressing how to fix a sticky window often involves checking sash cord, runners, and friction before condemning the latch itself.
Conclusion
Replacing a window latch is a quick win for any DIYer and a meaningful step toward securing and weatherproofing your home. By spending thirty minutes and twenty dollars, you’ve restored function, improved energy efficiency, and eliminated a security vulnerability. The skills you’ve used here, measuring, fastening, and testing, transfer directly to dozens of other home repairs. Start with one window and you’ll feel confident tackling the rest.