Windows are often overlooked until they stop working smoothly. If your double-hung or single-hung windows have become hard to open, won’t stay up, or slam shut on their own, the culprit is likely broken window springs. These metal coils (also called sash springs or balance springs) counterbalance the weight of the window sash, letting you operate it with minimal effort. When they wear out or snap, the entire window becomes frustrating and potentially unsafe. Fortunately, window spring replacement is a manageable DIY project that saves you hundreds in professional repair costs. This guide walks you through identifying the problem, gathering the right tools, and replacing window springs safely and correctly.
Table of Contents
ToggleKey Takeaways
- Window spring replacement is a manageable DIY project that can save you hundreds of dollars in professional repair costs while restoring smooth window operation.
- Common signs your windows need spring replacement include difficulty opening, inability to stay open, fast closing, visible rust, or seasonal performance issues.
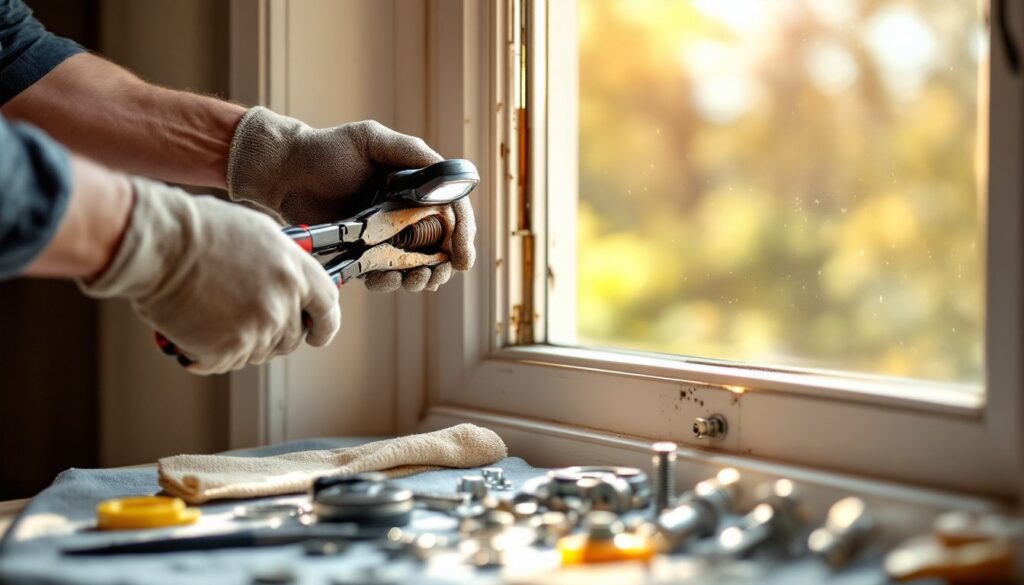
- The window spring replacement process requires basic tools like screwdrivers, pliers, and a flashlight, plus matching replacement springs that fit your window type and sash weight.
- New springs last 15–20 years when maintained with regular cleaning, silicone-based lubrication every two years, and gentle window operation habits.
- Always photograph the existing spring setup before disassembly, wear safety glasses and gloves, and test the window from both open and closed positions after installation to ensure proper seating.
Understanding Window Springs and Why Replacement Matters
Window springs work by storing mechanical energy that counterbalances the sash weight. In older windows, you’ll often find spiral springs or compression springs housed inside the frame jambs (the vertical sides of the window opening). Modern windows may use spring-loaded channels or tape-and-pulley systems with counterweights.
When springs fail, windows become inoperable or dangerous. A sash that suddenly drops can pinch fingers or crash down on objects. Windows that won’t stay open force you to prop them with sticks or blocks, which looks awkward and creates a safety hazard. Beyond function, broken springs also compromise weatherstripping performance and energy efficiency because the sash won’t seat properly.
Replacement springs are straightforward, they’re standardized window spring replacement parts designed to fit common frame styles. Most homeowners can handle this in an afternoon without specialist tools. Replacing them restores smooth operation and extends your window’s lifespan by another 10–15 years.
Signs Your Window Springs Need Replacement
Watch for these telltale signs that your springs are failing:
The sash is hard to open or requires unusual force. Friction from worn or bent springs makes the window feel stiff or sticky, especially if the frame itself is square and level.
The window won’t stay in the open position. A healthy spring holds the sash steady at any height. If it creeps down slowly or crashes shut, the spring is losing tension or has snapped.
The window slams or closes too fast. This suggests one spring has failed, and the remaining spring (if dual springs exist) is overcompensating. It’s both annoying and potentially harmful.
Visible damage inside the frame. If you can see the springs through access points or when you open the frame trim, look for rust, kinks, or obvious breaks in the coils.
Seasonal changes affect operation. Cold temperatures can momentarily worsen spring response, but persistent problems year-round point to hardware failure, not weather.
If you notice any of these issues, test the window’s balance by gently pushing the sash upward from a neutral position. It should move smoothly and stop where you release it. If it doesn’t, replacement is the fix.
Tools and Materials You’ll Need
Tools:
• Flathead screwdriver (for prying trim and accessing spring housings)
• Phillips head screwdriver (for fasteners)
• Needle-nose pliers (to remove old spring clips or retention hardware)
• Adjustable wrench or socket set (if your springs use bolts rather than clips)
• Utility knife (to cut caulk seal between trim and frame)
• Safety glasses and work gloves (mandatory for all steps)
• Measuring tape (to verify spring lengths and confirm specifications)
• Flashlight or headlamp (springs live in dark frame cavities)
Materials:
• Replacement spring set (matched to your window type and sash weight)
• Small cotter pins or clips (often included with new springs)
• Silicone caulk (to reseal trim after reassembly, if needed)
• Clean rags or paper towels (for cleanup and wiping away old lubricant and rust)
Before you buy springs, measure your sash height and check your window frame style (vinyl, wood, aluminum). Existing springs often have part numbers printed on them, photograph these before disassembly so you can order exact replacements. Home Depot, Lowe’s, and online retailers carry universal window spring replacement parts, though your window’s original manufacturer is your best source for the exact match.
How to Replace Window Springs: The Complete Process
Preparation and Safety First
Start by preparing your workspace. Lay a drop cloth or tarp below the window to catch small parts and debris. Make sure you have good lighting, a headlamp or work light is essential because spring housings are recessed inside the frame jambs.
Put on safety glasses and work gloves immediately. Broken springs have sharp ends and jagged edges: compressed springs can snap suddenly if mishandled, so treat them with respect. If the window is painted shut or sealed with caulk, use a utility knife to carefully cut the seal around the trim. Open the window fully to access the frame cavity.
Take a photograph of the existing spring setup before you remove anything. Note the spring’s position, orientation, and how it connects to the frame. This photo becomes invaluable if you get confused mid-project.
Removing the Old Springs and Installing New Ones
Step 1: Access the Spring Housing. Locate the trim or cover plate that conceals the spring cavity in the frame jamb. This is usually a thin strip of wood or vinyl. Gently pry it away using a flathead screwdriver. Be patient, forced removal cracks the trim.
Step 2: Remove the Fasteners. Springs are held in place with clips, cotter pins, or bolts. Use needle-nose pliers to remove clips or pins. If your springs use bolts, an adjustable wrench will undo them. Keep all fasteners in a labeled container so you don’t lose them.
Step 3: Slide Out the Old Spring. Carefully slide the worn spring out of its channel or housing. If rust or corrosion makes it stick, apply a light penetrating oil (like WD-40) and wait a few minutes before trying again. Never force it, you risk damaging the frame.
Step 4: Clean the Spring Channel. Wipe out the cavity with a clean rag. Remove dust, rust flakes, and old lubricant. A clean surface ensures the new spring slides smoothly and operates quietly.
Step 5: Insert the New Spring. Slide the replacement spring into the same channel. Align it carefully so it seats fully and evenly. New springs are often pre-lubricated, so they’ll glide easily if the channel is clean. Double-check that the spring orientation matches the old one, springs have a direction, and installing them backward causes binding.
Step 6: Secure with Fasteners. Reattach the clips, cotter pins, or bolts using the original hardware if it’s in good condition. Tighten bolts snugly but don’t over-torque them: you risk stripping threads or warping the frame.
Step 7: Test the Window. Close the access trim and test the window from both fully closed and fully open positions. The sash should move smoothly and hold steady when released. If it’s still stiff or won’t stay put, the spring may not be fully seated, pop the trim back off and reseat it.
Repeat this process for the opposite frame jamb if your window has dual springs (most do). Once both sides work smoothly, reseal any caulk that was disturbed during disassembly. Professional guides like Family Handyman’s window spring replacement tutorial and Bob Vila’s comprehensive approach offer additional visual references if you want extra reassurance during any step.
Maintenance Tips to Extend Spring Life
New springs last 15–20 years with basic care. Here’s how to protect your investment:
Keep the frame clean and dry. Moisture causes rust and corrosion on springs. After storms or during humid seasons, wipe down frame channels with a dry cloth. If your windows are in a salt-air environment (coastal areas), inspect springs annually for early corrosion signs.
Lubricate the tracks and springs periodically. Every two years, apply a silicone-based dry lubricant (not oil, which attracts dust) to the sash channels and around spring housings. Avoid WD-40 for long-term lubrication, it’s a penetrant, not a protectant. Dry silicone spray or PTFE-based lubricants are better for moving window parts.
Operate windows gently. Yanking or slamming windows strains springs and frame hardware. Smooth, deliberate movements add years to their lifespan. Teach kids and guests the right way to open and close windows without force.
Check caulk and weatherstripping annually. Damaged seals let moisture into the frame cavity, which accelerates spring corrosion. Reseal gaps with silicone caulk as needed. Resources like Today’s Homeowner maintain seasonal maintenance checklists that remind you of window checks alongside other home care tasks.
Clean sash tracks twice a year. Dirt and debris buildup force springs to work harder. Use a vacuum with a brush attachment or a damp rag to clear tracks, especially at the corners where grime accumulates.