If your home has hard water, your water softener is quietly working overtime to keep scale and mineral buildup out of your pipes, appliances, and fixtures. But like any filter system, it needs regular maintenance, specifically, filter replacement, to keep doing its job effectively. A clogged or exhausted water softener filter doesn’t just perform worse: it can let sediment slip through and reduce water quality across your whole house. The good news? Replacing the filter yourself is straightforward, takes less than an hour, and saves you a service call. This guide walks you through when to replace it, how to do it right, and how to pick the best filter for your system.
Table of Contents
ToggleKey Takeaways
- Water softener filter replacement every 6 to 12 months protects your resin bed and prevents sediment from damaging pipes and appliances.
- Reduced water pressure, cloudy water, and longer regeneration cycles are clear signs your water softener filter needs replacement.
- You can replace your water softener filter yourself in 15 to 30 minutes by turning off the water supply, unscrewing the housing, and installing the correct replacement cartridge.
- Choose the right replacement filter based on your softener’s specific model and housing size—sediment filters, activated carbon, or combination cartridges each serve different water quality needs.
- Budget filters cost $30–$80 but premium brands like Culligan, 3M, and Pentair last longer and offer better value when calculated per month of use.
Why Water Softener Filter Replacement Matters
Your water softener’s filter acts as the first line of defense against sediment, rust, and other contaminants that sneak into your home’s water supply. Over time, these particles accumulate on the filter media, reducing flow rate and effectiveness. A neglected filter doesn’t just get sluggish, it can actually release trapped sediment back into your water, leaving you with cloudy water, stained fixtures, and reduced appliance lifespan.
Regular filter replacement protects the resin bed (the actual ion-exchange material inside your softener), which is expensive to replace and does the heavy lifting of softening. Think of the filter as the bodyguard: keep it clean and sharp, and the resin stays healthy. Most manufacturers recommend replacing filters every 6 to 12 months, depending on water quality and usage. If you skip it, you’re essentially letting your softener work with one hand tied behind its back.
Signs Your Water Softener Filter Needs Replacement
Watch for these red flags that your filter is past its prime:
• Reduced water pressure or flow from soft-water taps, a telltale sign the filter is clogged.
• Cloudy or discolored water coming from treated lines, suggesting sediment is breaking through.
• Bad taste or odor in softened water, even after running the tap for a moment.
• Visible sediment in a clear bowl or sight glass (if your softener has one).
• Longer than usual regeneration cycles, meaning the system is struggling to work through the filter.
• Scale buildup on faucet aerators or showerheads even though having a softener in place.
Many homeowners on a seasonal maintenance schedule check their filter during the annual spring inspection. This approach, detailed in resources like July home maintenance checklists, keeps systems running smoothly year-round. Don’t wait for problems to appear: routine replacement is cheaper and easier than troubleshooting poor water quality.
How to Replace Your Water Softener Filter
Step-by-Step Replacement Process
What You’ll Need:
• Replacement filter cartridge (correct model for your softener)
• Adjustable wrench or filter wrench (if the housing is tight)
• Bucket or towels (to catch residual water)
• Optional: new O-ring (check your manual: some systems include it)
Safety First: Turn off the softener and water supply before opening the filter housing. Even though water pressure is usually low at the filter, you don’t want surprises.
Steps:
-
Locate the filter housing. Most softeners have a transparent or opaque cylindrical housing on top or to the side. Check your manual if you’re unsure.
-
Relieve pressure. Open the nearest treated-water faucet (usually a kitchen tap) for a few seconds to relieve any remaining pressure in the lines.
-
Unscrew the housing. Use your wrench to loosen the top bowl or head of the filter housing counterclockwise. Some are hand-tight: others need a tool. Go slow, don’t strip the threads.
-
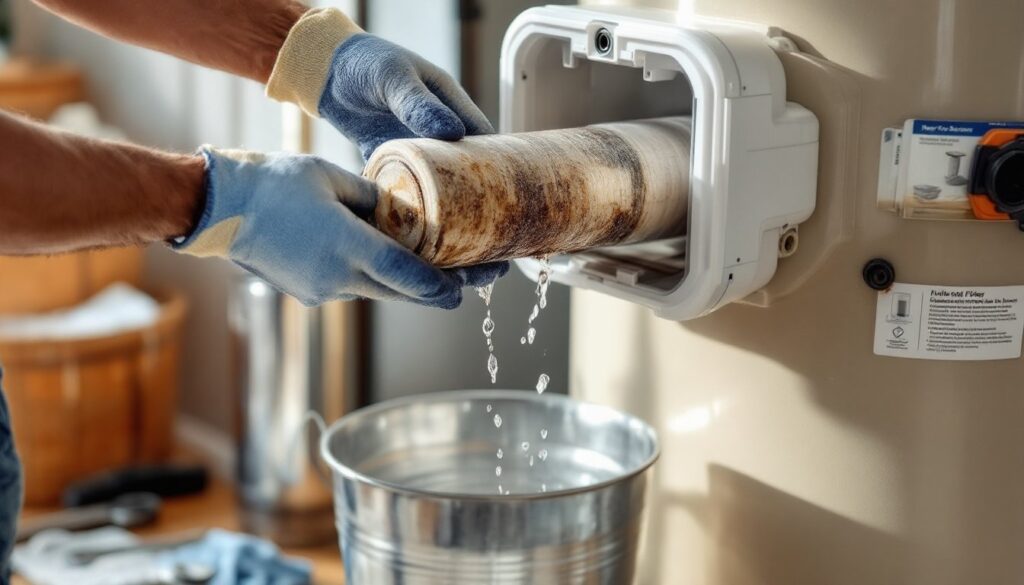
Remove the old filter. Lift the cartridge straight up and out. Water will drip: have your bucket ready. Discard the old filter.
-
Inspect the O-ring. The rubber seal at the top of the housing should be clean and pliable. If it’s cracked, dried out, or doesn’t bounce back when pressed, replace it with the spare (often included or sold separately).
-
Rinse the housing. Wipe the inside of the bowl with a clean cloth to remove any sediment or debris.
-
Install the new filter. Slide the new cartridge straight down into the housing, making sure it seats fully on the bottom.
-
Screw the housing back on. Tighten by hand first, then use your wrench for a firm (but not overtightened) seal. Over-torquing can crack the bowl.
-
Turn the water supply back on. Watch for leaks around the housing for the first minute. If water drips from the seal, turn off the water, remove the housing, reseat the O-ring, and try again.
-
Flush the line. Run treated water from a tap for 30 seconds to clear out any loose media or dust from the new filter.
Resources like Family Handyman include detailed tutorials on home plumbing repairs that can supplement these steps if you need visual reference. The entire job usually takes 15 to 30 minutes.
Choosing the Right Replacement Filter
Not all water softener filters are created equal. Your softener likely has a proprietary cartridge designed by the manufacturer, dropping in the wrong size or type won’t fit and won’t work.
Identify Your System:
Look at the label on your softener tank or check the manual. Most filters are named by their housing size (10-inch, 20-inch, or specialty sizes) and media type (sediment, carbon, or combination). Write down the exact model or housing dimensions before shopping.
Filter Media Types:
• Sediment filters catch particles down to 5 microns and are the standard first stage. Good for well water or areas with visible particulate issues.
• Activated carbon filters remove chlorine, some chemicals, and odors. Often used in municipally supplied homes.
• Combination cartridges do both. Slightly higher cost but fewer components to manage.
Quality and Micron Rating:
Lower micron ratings catch smaller particles but clog faster: 10-20 micron filters are the sweet spot for residential softeners, offering good flow without replacing weekly. Premium brands like Culligan, 3M, and Pentair hold up well and have broad availability. Budget options work but may need replacement more frequently.
Cost and Lifespan:
Expect to pay $30–$80 for a standard replacement cartridge, depending on brand and media type. Better filters often cost more upfront but last longer, saving money overall. Check the cost per month of use, not just the sticker price. Product testing resources like Good Housekeeping occasionally review home water treatment options and can guide your decision.
Maintenance Tips to Extend Filter Life
A few habits keep your filter working longer and your water quality high:
• Change filters on schedule. Mark your calendar for 6, 9, or 12 months depending on your water hardness and household size. Don’t let it go by feel alone, you’ll miss the gradual decline in performance.
• Inspect during regeneration. Your softener typically regenerates (recharges) at night or on a set day. If the cycle runs much longer than usual or makes unusual noises, the filter may be clogged.
• Monitor water hardness with test strips. Inexpensive test strips (available at any hardware store) tell you if your softener is still doing its job. If hardness creeps up even though a “new” filter, the filter may be undersized for your water quality.
• Keep the system powered. Softeners need electricity for the control head and timer. A power loss can disrupt regeneration cycles and let sediment accumulate faster.
• Flush the system after long absences. If you’re away from home for weeks, run soft water through the lines for a minute when you return to clear any stagnant water.
• Store spare filters properly. Keep replacement cartridges in a cool, dry place. Don’t expose them to direct sunlight or freezing temperatures, which can degrade the media.
Routine attention prevents surprises and keeps water quality consistent across your home.
Conclusion
Water softener filter replacement is one of the easiest home maintenance tasks you can tackle yourself. A clean filter keeps your system efficient, protects your resin bed, and ensures good water quality throughout your home. Mark your calendar, grab the right cartridge, and spend 30 minutes on the job twice a year. Your appliances, pipes, and water heater will thank you.